CSE141 Tutorial: Generating Memory Module with Xilinx "CORE Generator"
In lab 4 you will be implementing the back-end of your processor. In order to do so, you will need to generate memory modules for both your data and your instruction memories. In Lab 2 we gave you an instruction memory module that was generated using this same utility. However, you will need to make some modifications to your instruction memory in Lab 4 so you will be generating the instruction memory module.
The following steps will give you a shiny new memory module. Note that the tutorial is based on generating a data memory module. Only small changes will be needed to generate the instruction memory module.
- Launch the "CORE Generator" utility. You can find it at 'Start - All Programs - Xilinx ISE XYZ - Accessories - Core Generator' (where XYZ is the version of Xilinx ISE you are using).
- Choose 'Create new project'.
- Set 'Family' as 'Virtex4' and 'Device' as 'xc4vlx25'.
- Set 'Design Entry' to 'Verilog'.
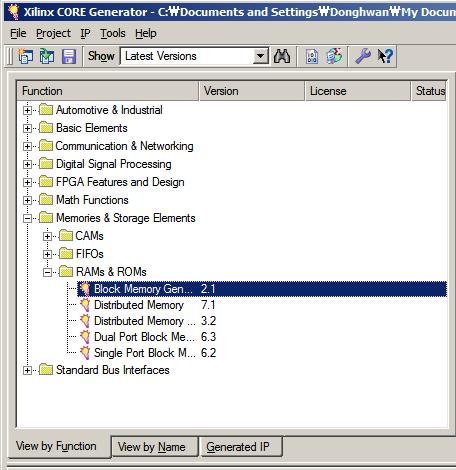
- Choose 'Block Memory Generator' and click 'customize'
- Type the component name you want to use, then click 'next'.
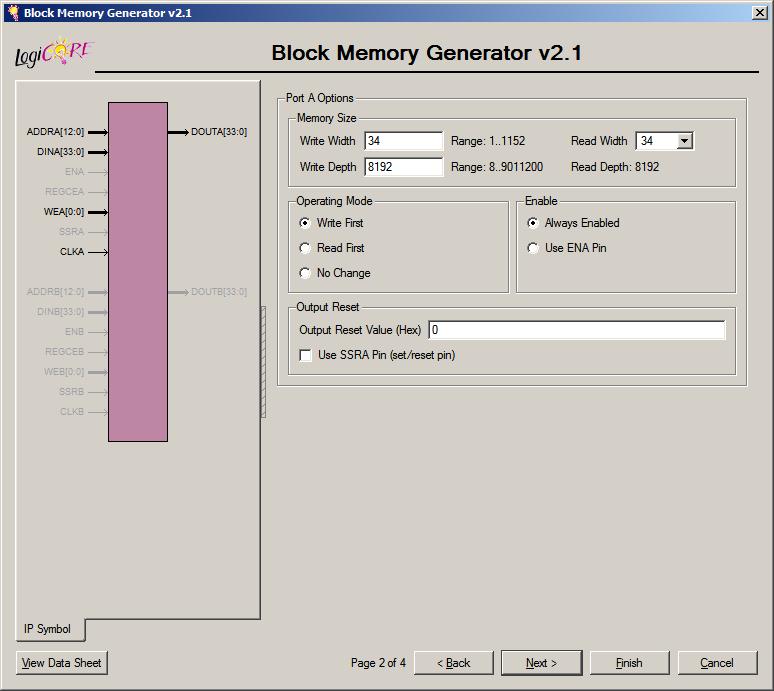
- Set 'Memory Width' to 34 and 'Write Depth' to 8192, meaning that you are generating a 34-bit width, 8192 entry memory module. When you generate an instruction memory module later, set 'Memory Width' to 17.
- Check 'Load Init File', and set 'Coe File' to the name of the coe file you want to initialize the memory with. Fianlly, click 'finish' button to generate the memory component.
- After generating the memory module, you will find a few files in the project directory. Copy *.v, *.ngc, *.mif files to your Xilinx project directory and add them to the project as you did in lab 1. For the usage of the generated module, refer to *.veo file.